SOURCE SHARPNESS / CONTROLLED CODE EXPERIMENT
Coloring Page Maker: Does 300 DPI Fix a Blurry Photo?
No. This coloring page maker's 300 DPI export does not restore edges lost in a blurry source. It traces the visible input boundaries, then fits the result onto printable paper. In our controlled sailboat experiment, adding blur made parts of the trace faint or disappear even though all three inputs had exactly the same pixel dimensions.
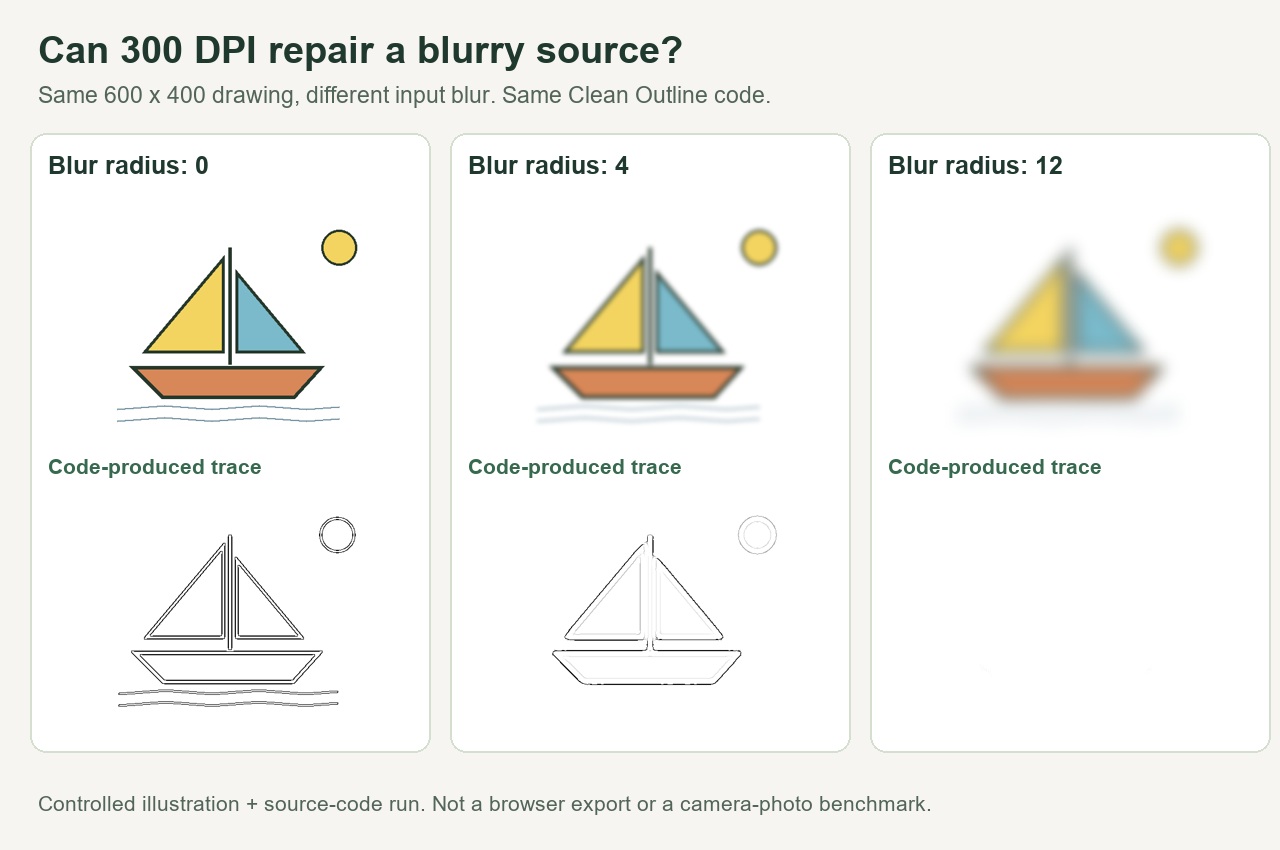
What we changed, and what we kept fixed
We drew one sailboat with two sails, a mast, a hull, a sun and two thin water lines on a white 600 × 400 pixel canvas. We saved it without added blur, then made copies with Pillow GaussianBlur radii 4 and 12. We chose these settings to make the contrast visible; they are not recommended camera settings or a scale of real-world focus quality.
The three inputs retained the same dimensions and composition. Each went through the same Clean Outline preset. We downloaded the public site's app.js, confirmed that its bytes matched the local deployment source, and ran its unchanged blurGray and makeLineArt functions in Node. A typed-array container supplied the ImageData storage. The tracing code and preset values were preserved.
This isolates a specific step: tracing already-decoded pixels. It does not test the browser's file decoding, page resizing, download metadata or a physical printer. We did not submit these illustrations through the site's browser interface, and the displayed results should not be mistaken for full exported A4 pages.
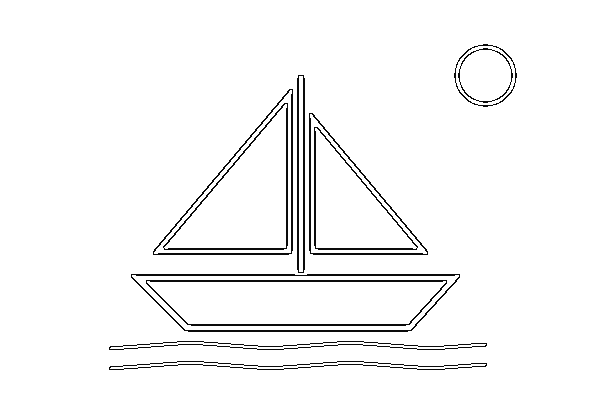
Input blur radius 0

Input illustration, 600 × 400 pixels.
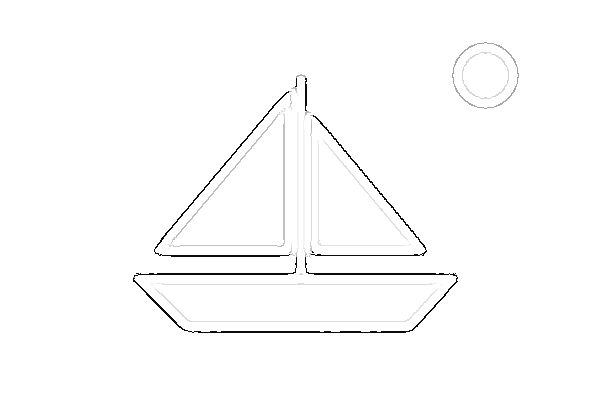
Input blur radius 4

Input illustration, 600 × 400 pixels.
Input blur radius 12

Input illustration, 600 × 400 pixels.

What the three traces actually show
With no added blur, both water lines, the circular sun and the boat boundaries appear in the trace. At radius 4, the water lines disappear from the visible result and the sun becomes pale; stronger boat boundaries remain. At radius 12, the trace is almost blank. The input still looks like a boat to a viewer, but that does not give the edge tracer a strong enough boundary to draw the same outline.
We also counted output pixels using two fixed thresholds. A pixel below 128 is our definition of a dark mark; a pixel below 250 includes very faint marks. Because the output is grayscale, its red channel gives the same value as its green and blue channels. Both counts use all 600 × 400 = 240,000 pixels, including the background.
| Input blur radius | Pixels below 128 | Pixels below 250 |
|---|---|---|
| 0 | 8,436 | 8,436 |
| 4 | 2,282 | 5,246 |
| 12 | 0 | 49 |
These are counts, not an accuracy score. More dark pixels could mean helpful contours or unwanted clutter. The radius-12 output has no pixels below 128, but it is not completely white: 49 pixels fall below 250. That distinction matters when a preview appears blank but still contains faint marks.
Download the measurement record to inspect input and output hashes, the exact source-code hash and the settings. The files above are lossless PNGs at the tracing dimensions. We did not enlarge them before counting pixels.
Why a large download cannot rebuild these missing contours
In this site's implementation, the image is traced before it is placed on the printable canvas. The page-layout step draws the existing line art at the chosen A4 or US Letter size; it does not identify a missing mast, reconstruct a wave or rerun the source with more detail. The 300 DPI setting describes the export density. It is not a source-sharpening control. You can inspect that order in the current tool code.
What to check when your coloring page looks too faint
Open the original file at full size and look at the particular edge you want the child to color: an eye, a wheel, a pet's outline. If it is already indistinct, try a clearer original or take another picture with the subject still. This is a practical next step, not a guarantee that every clearer photo will trace well. Avoid assuming that a larger file or a paper-sized download contains more useful source detail.
For a source that is clear but visually crowded, use the same-photo framing comparison. For the download format itself, read the PNG versus PDF file inspection. Those solve separate decisions from source blur.
Watch the source-sharpness experiment
For a sharp source with weak contrast, compare the dark-input and line-style experiment.
Scope and sources
This experiment covers one original drawing, three deliberate blur settings and one tracing preset. It cannot predict a particular phone photo, motion blur, another browser or another generator. We reviewed the specified Mimi Panda, iColoring and Canva tool pages on October 9, 2026. Within those pages, we did not find this matched source-blur experiment with downloadable inputs and measured traces; this is not a claim about everything on their domains.
The blur operation is documented in Pillow's ImageFilter reference. All counts and visual observations on this page come from the linked experiment files. To understand what the converter detects, see how this coloring page maker traces edges.