REAL PHOTO-TO-LINE-ART EXAMPLE
Photo to Coloring Page: See a Real Before-and-After
Yes, you can turn a photo into a coloring page without generative AI. This page shows the same sample photo before and after it was processed by our browser-based edge tracer, so you can judge the actual lines before trying your own picture.
Try your photo in the coloring page tool
Watch the real photo examples
A narrated look at the actual dog and car photo results shown below, including the extra lines their backgrounds create.
One photo, one real tool result
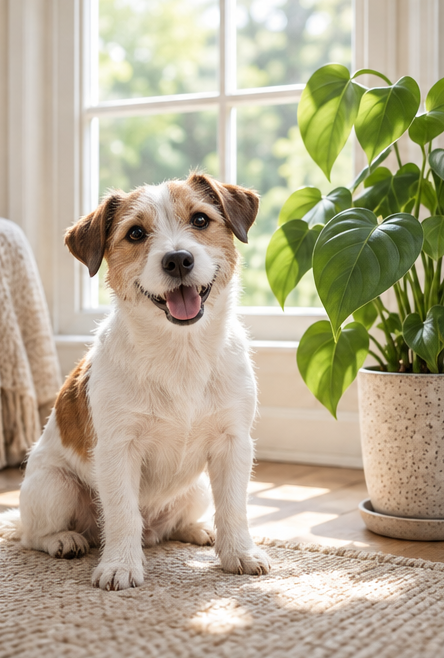
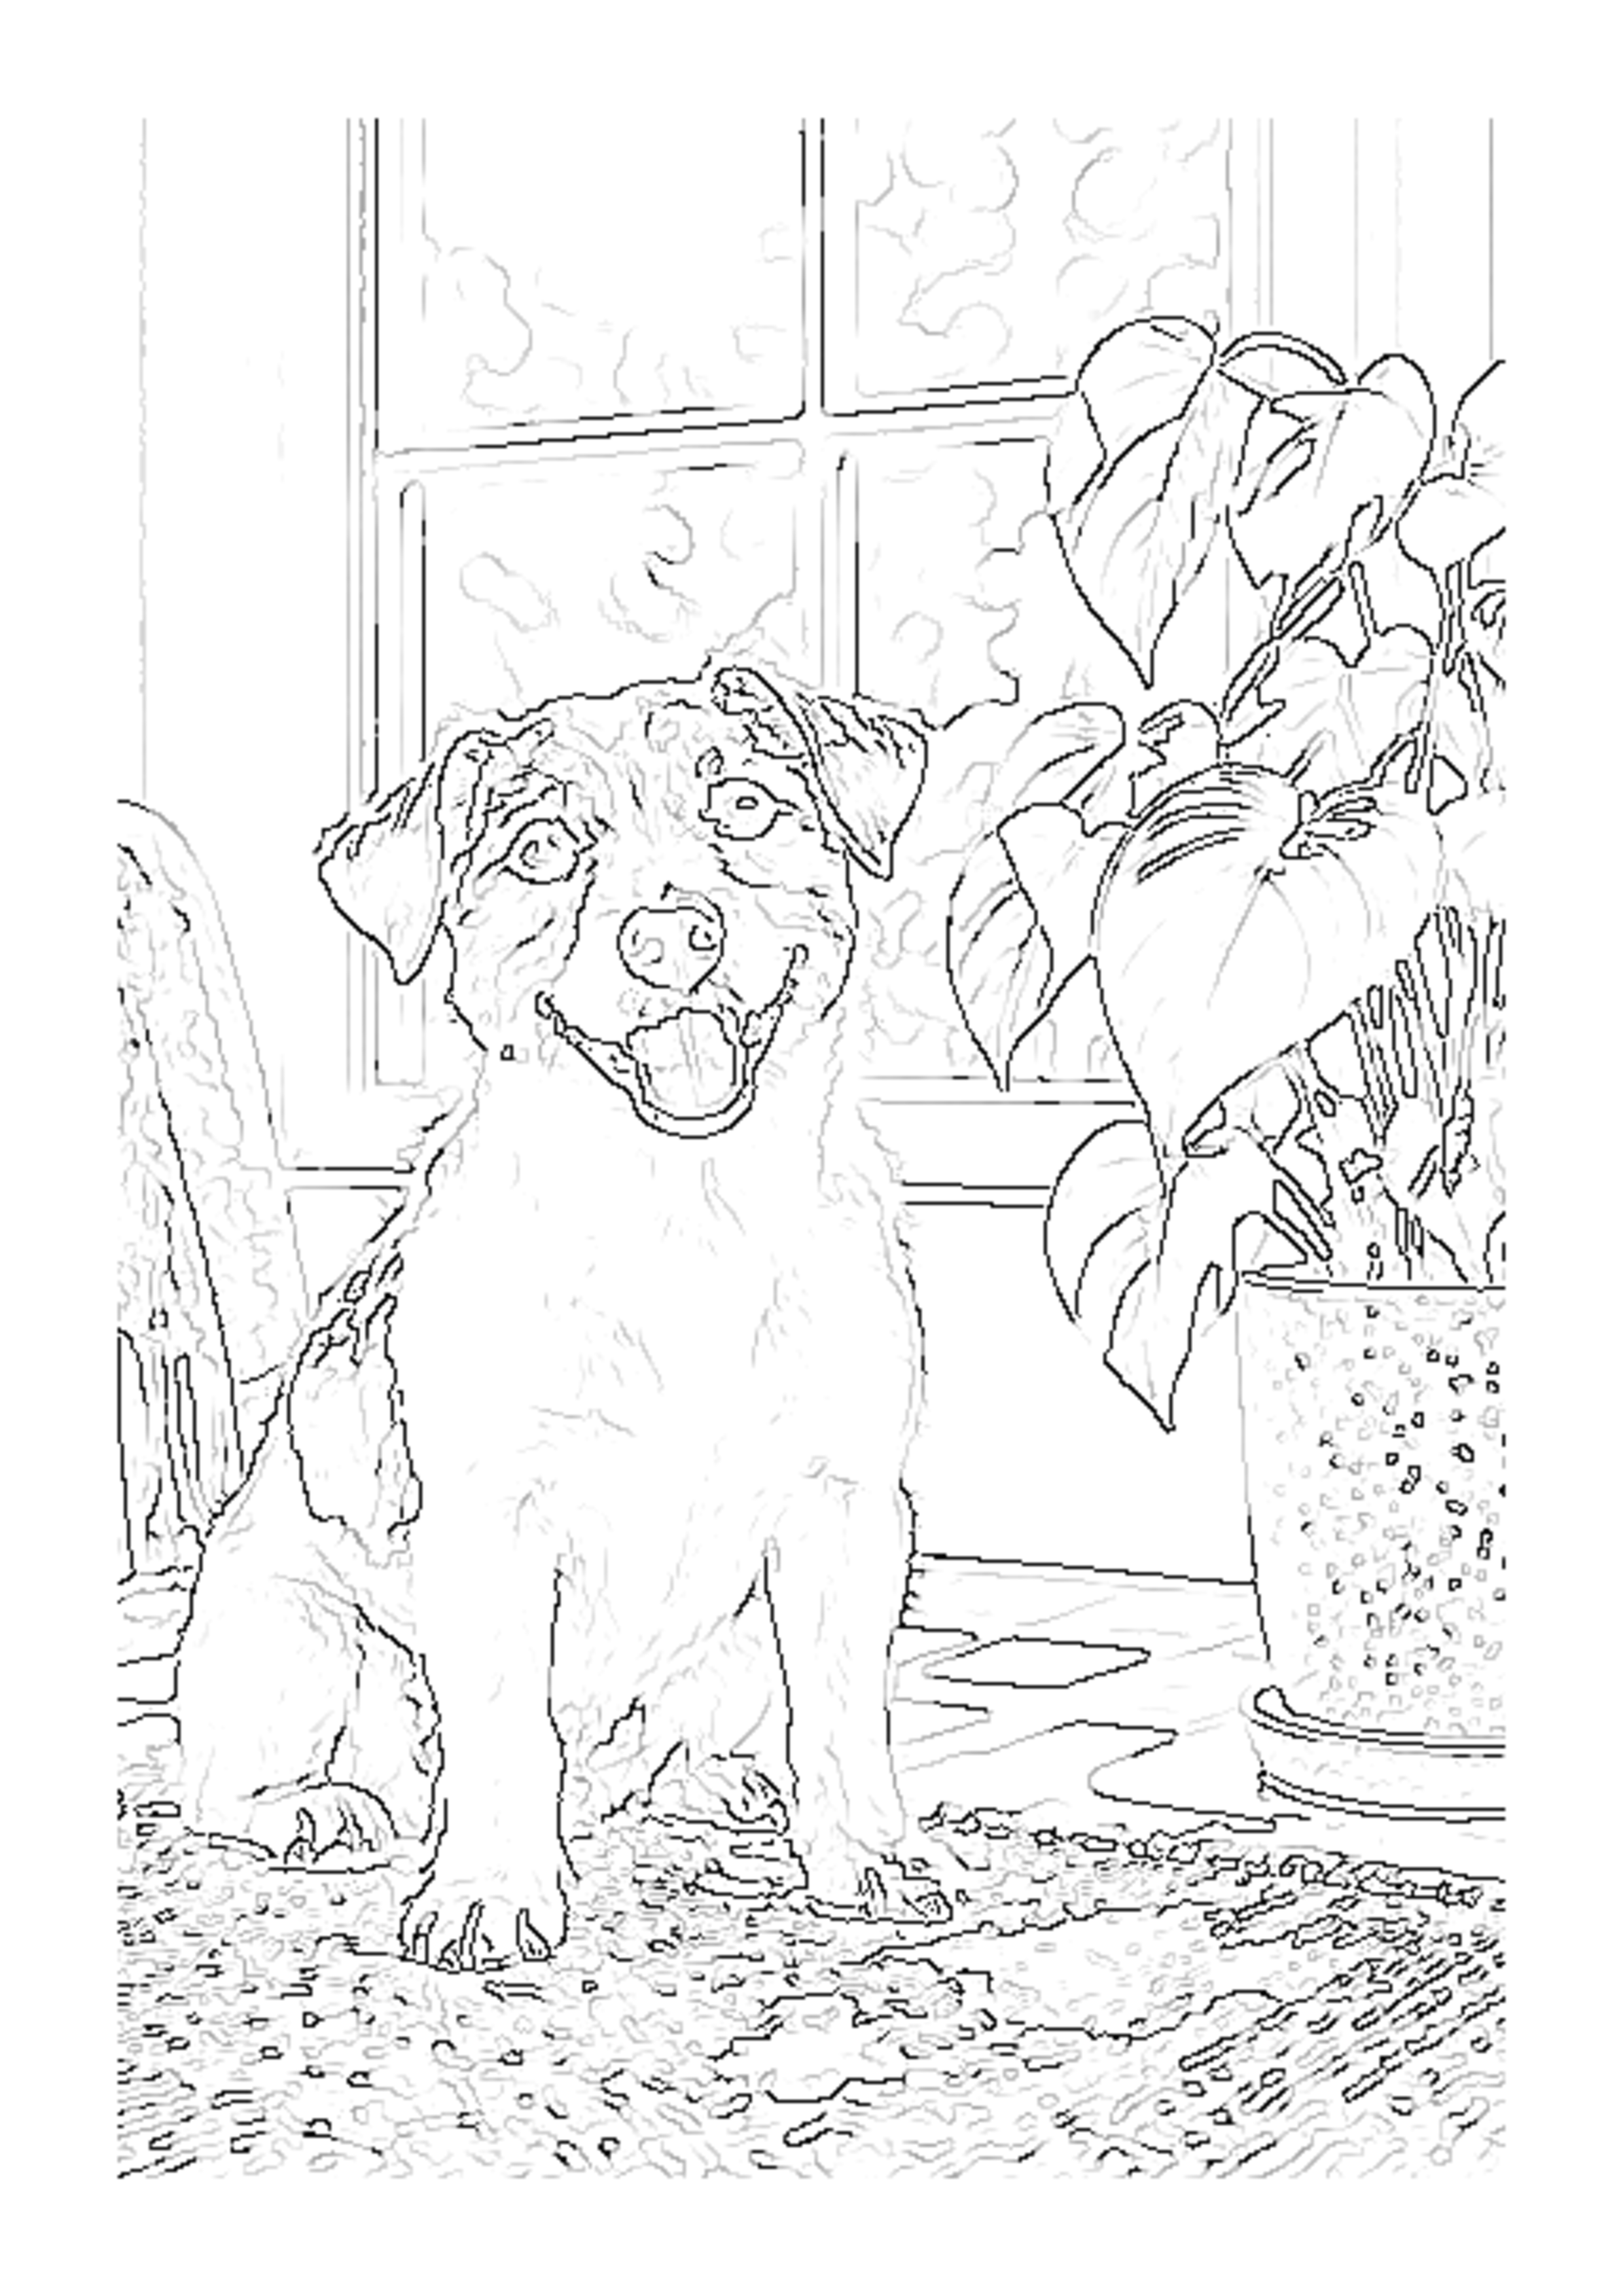
This is an unretouched output example. The dog's face and outer shape remain visible, while plant, window, and rug textures also create lines. Results vary with the source photo; this example is not a promise that every image will look the same.
What we saw when checking this exact result
We processed the sample in the site's browser tool with Clean Outline and inspected the same input and output together. The dog's outer shape, eyes, nose, and open mouth are easy to identify in the result. The coat becomes a mix of broad white areas and a few fine marks rather than a fully detailed fur drawing. The window frame remains as long straight lines, the plant keeps many small leaf edges, and the textured rug creates a dense patch beneath the paws.
That trade-off is useful to see before you upload a personal picture: the subject can stay recognizable, but the tracer follows background edges too. If you want large, open regions to color, start with a photo that has a plain wall or uncluttered outdoor background. If the subject is small in the frame, crop it in your own photo editor before uploading; this tool does not have a crop or subject-isolation control.
We chose this sample because it includes a clear subject plus a deliberately detailed setting. It makes both outcomes visible in one pair: the dog's face survives the conversion, and fine scenery still adds marks. The images are the site's actual input and output pair, not a polished drawing created separately to represent what the tool might do.
A second example: a car in a busy parking lot
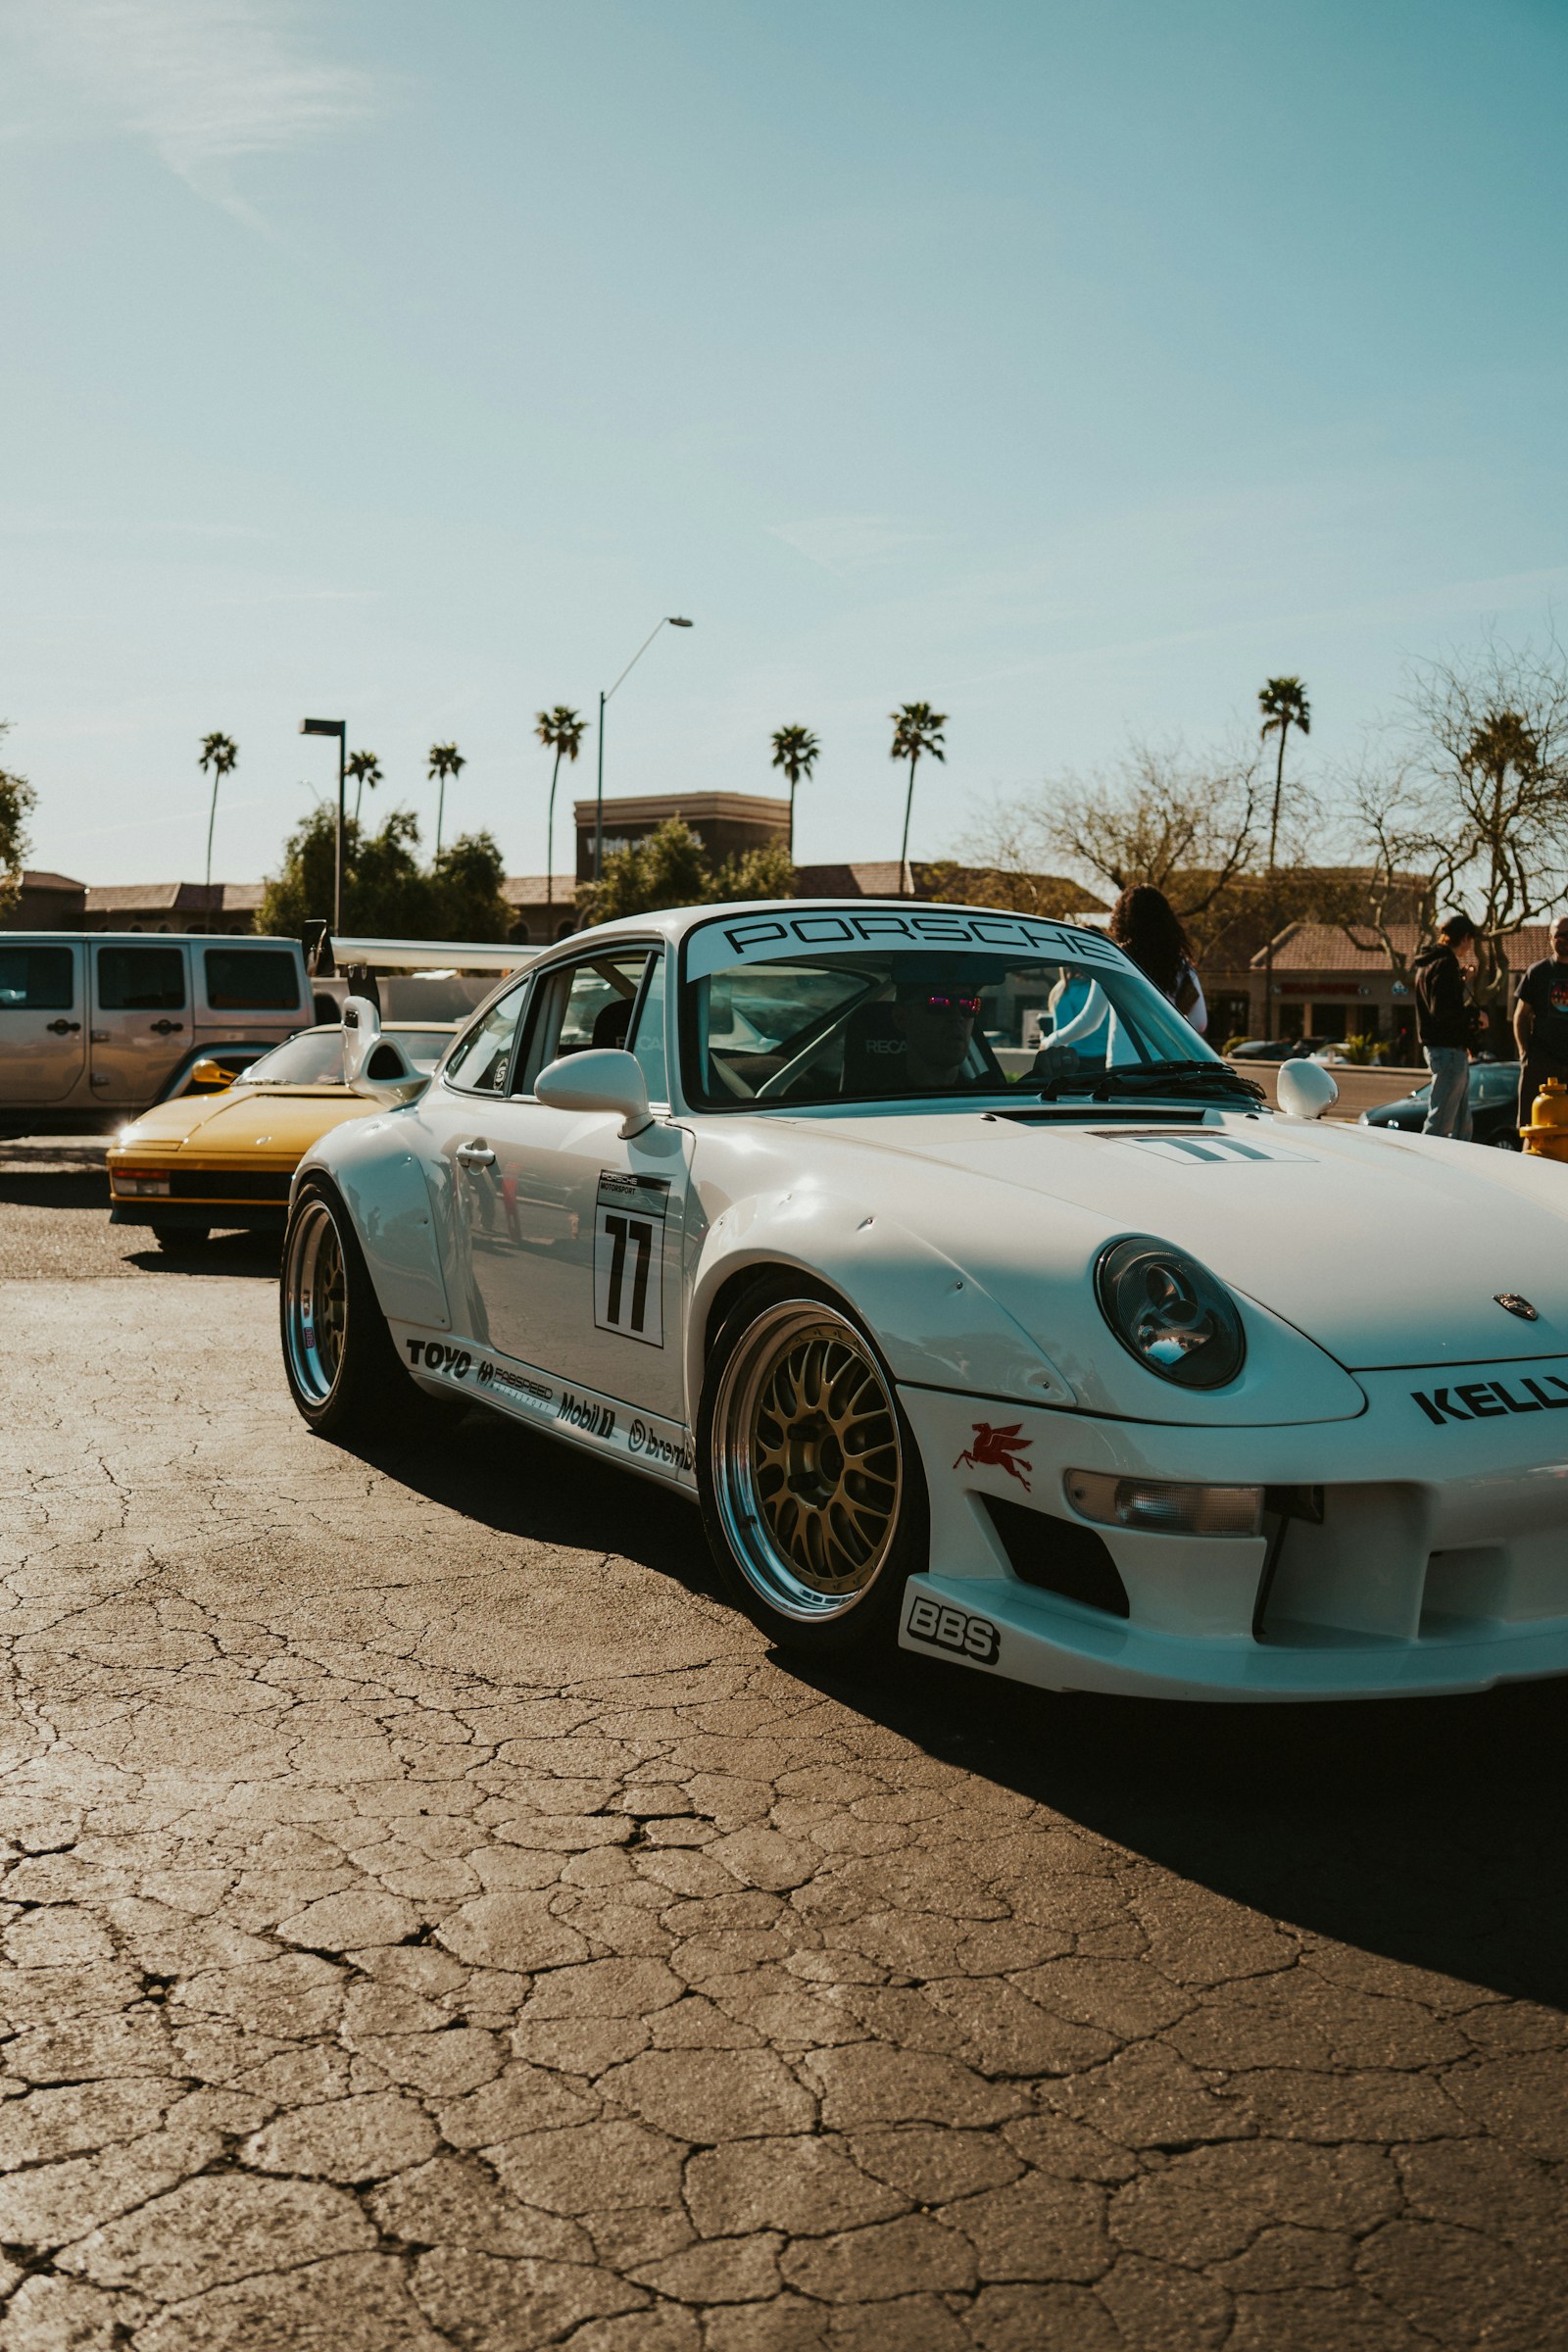
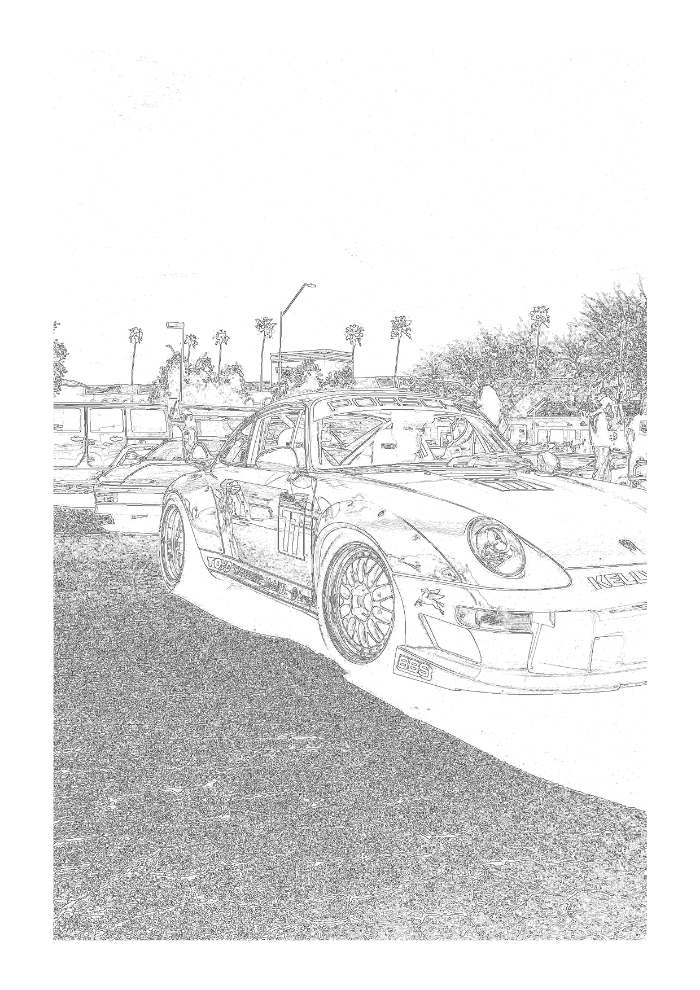
The second site test used a 1600 × 2400 portrait photo and generated a 2480 × 3508 pixel A4 page. The car's roof, windows, wheels, and body remain traceable, but nearby parked cars, tree edges, lot markings, and pavement details also appear. In the same-input style check, Clean Outline and Simplified looked similar at preview size; Bold Comic made the ground shadow much darker. That one comparison does not rank the styles for every photo. The source was photographed by Nicholas Fuentes and is used under the Unsplash License.
What makes a photo easier to color?
Choose a sharp, well-lit picture where the subject is large and easy to distinguish from nearby objects. A plain or softly detailed background gives the line tracer fewer unrelated edges to include. Before generating, check the preview for three things: whether the subject outline is continuous, whether touching objects stay separate, and whether background marks compete with the part you want to color.
- Good starting point: one clear subject, even light, visible contrast, and a simple background.
- Expect extra marks: fur, leaves, patterned fabric, grass, gravel, and textured floors can all contain edges.
- Try a different source: blur and low contrast hide boundaries; the tool cannot restore details that are not visible.
- Keep expectations realistic: this tool traces visible contours in your browser. It does not invent missing details or automatically cut the subject out of its background.
Choose a style by checking the preview
Clean Outline is a useful first preview for a clear subject. Simplified keeps fewer marks in many busy scenes, while Detailed can show more small edges in a sharp image. Bold Comic uses heavier contours, and Pencil Sketch gives a softer line appearance. These styles change the edge treatment; none can turn a blurred or cluttered source into a clean studio drawing. Compare the same photo in the tool before downloading.
Compare all five styles with your photo
Can I make a coloring page from a photo without AI?
Yes. This site uses local image processing to trace visible edges; it does not send your photo to a generative AI service. Choose one JPG, JPEG, PNG, or WEBP photo (up to 15 MB and 30 megapixels), preview the result, then download a PNG or PDF at 300 DPI for A4 or US Letter paper. No account is required, and the photo is processed in your browser rather than uploaded.
Questions about custom photo coloring pages
Can I turn my own photo into a coloring page?
Yes. Upload one supported image, compare the style previews, and download the result as a PNG or PDF. A clear subject and simple background usually make the output easier to read.
How can I make a coloring page from a photo without AI?
Use a tool that traces the visible edges in the image. This tool processes the photo in your browser and does not use a remote generative AI service.
Why does my photo coloring page have too many lines?
Background texture, shadows, fur, leaves, and overlapping objects all create visible edges. Try a simpler photo or compare the Simplified preview; the tool does not automatically remove the background.
Can I make a coloring page for a child from a family or pet photo?
You can try a family or pet photo, then inspect the preview for small or crowded details. This browser tool does not label subjects or filter content, so choose an image appropriate for the intended activity.
Community questions that inspired this guide
These individual discussion links were shared as examples of people asking about photo-to-coloring-page help and non-AI approaches. They are anecdotal conversations, not a survey or a measure of overall demand.
- “Need help converting photos into coloring book pictures” — r/PhotoshopRequest
- “Can you make me coloring pages for kids?” — r/Coloring
- “Does anyone know anyone who makes custom coloring books/pages WITHOUT using AI…” — r/Coloring
For more on the processing steps, read how photo-to-line-art conversion works. For a style comparison, see the photo style guide.